Welcome!

This is my blog for Tom Houston Photography. My aim here is to help share knowledge. I have been fortunate enough to know some very smart and helpful photographers who have helped me a lot with my photography. This blog is how I want to return the favour, give back and help out others.

I hope you enjoy,

Tom
Showing posts with label Macro. Show all posts

Saturday, 1 June 2013

Photos: The Wonderful Land of Macro

Here are some photos I took when it was a really misty day outside and I really like how all these turned out so please check out the others on my Website and see for yourself.

The D600 and the 105mm VR Micro is a beautiful marriage.

Petal and Droplets - 105mm VR Micro - D600

Allium - 105mm VR Micro - D600
I thought I would post these as I edit my shoots I have done recently.  Trying to keep a good flow of photos coming if I can!  

Thursday, 23 May 2013

Photos: Macro

Hey folks,

I have just uploaded some more photos to my new arrivals gallery.  They are some some very nice macro shots and with the D600 they are even better than before.  Hope you like them and I have a lot of shoots setup so stay posted for those after I do them!

Tulip - D600

http://www.tomhoustonphotography.ca/#/personal/70c1454423b96e9e80c8e51dfc104b6b


Friday, 11 January 2013

Video: What's In My Bag

He folks,

Just made a "what's in my bag" video recently because of the shift in gear I have done recently so this will be the most up to date gear.  It is all the same as my last gear review video however this is all of the gear I use.

Hope you like it,

Tom

Wednesday, 23 May 2012

Video: 105mm f/2.8 Micro (Macro) VR Review

Video: 105mm f/2.8 Micro (Macro) VR Review

Here is my video review of the 105mm f/2.8 Macro VR lens on my Youtube channel.  I know I already have a blog post reviewing this lens so check it out here and I will put the video link on that blog post as well.

Here is the video link: http://www.youtube.com/watch?v=JfbknCpkio0

Hope that helps!

Tuesday, 1 May 2012

Photos: Orchid (In Colour)

Hey,

I wasn't only going to post the black and white photos I did of the orchid and here is one of the ones I kept in colour.  I have two more on my site that I think you should check out (In the new arrivals gallery) at www.tomhoustonphotography.ca.  Here is one of my favourites:

Orchid - 105mm f/2.8G VR Macro

Hope you enjoy theses.  I had a lot of fun taking these photos.

Tom

Monday, 30 April 2012

Photos: Orchid B&W

Hey,

Had a lot of fun with a spray bottle and an orchid last night.  I decided to push myself a little and do some black and whites since I always do colour shots.  So I posted them onto my site on the new arrivals section and here is one of them:

Orchid - Black and White - 105mm f/2.8 Macro VR
I highly recommend just playing around inside with a flash and a macro lens with flowers or other cool objects.  I was originally using my tripod however I find it too restrictive so I turned up my flash and my stutter speed (1/250s) and used my camera handheld.  I ended up using my lens hood for my 105mm as a stand for my SB-900.  Surprisingly it worked really well.  I absolutely love the bokeh and well everything about the 105mm.  Stunning lens.  If you don't have one and love macro I highly recommend it!

Please go check them out on my site at www.tomhoustonphotography.ca.

I hope you like these shots, I really do and stan posted for some colour ones later!

Saturday, 28 April 2012

Photos: FS Shot #8!

Yes that is right ladies and gentlemen,

My 8th FS shot is up and I am very happy with it.  I hope you guys like it too.  The model was lovely and my MUA was very good as always.  Here is the FS Extra and I have both this and the actual FS shot on my site.  You can find the FS shot in my FS gallery as well as with this shot below in my new arrivals gallery.  Hope you enjoy!

Flower Series Extra - 105mm f/2.8 G Macro VR

Remember my site is www.tomhoustonphotography.ca if you didn't know/click on the link above.  

Thanks for following my work,

Tom

Monday, 12 September 2011

Update: Photos:

Hey,

So I managed to make a contact at a local flower store.  This means I can get scrap flowers as well as they may want me to take photos for their website.  I call that a good day.

I got some more flowers and one of them was a very nice orchid.  Also I decided to add some water drops into the scene.  I like the extra detail as well as the reflections in the droplets. So without further adieu:

Orchid & Water Drops - 105mm VR Macro
 And I like trying black and whites so this was my B&W one.
Orchid - 105mm VR Macro
Hope you enjoy!  And don't forget to check out these photos are more on my Flickr.  Lastly if you have any questions please don't hesitate to e-mail me at tomhouston7@gmail.com.

How To: My Macro Shoot

How To: My Macro Shoot

I was wanting to take some photos so I went out and bought a Daisy to do some macro photography with.  This was the first time I have done "serious" in-door macro shoot and I like my results.  so I thought it would be helpful to explain how I got the shots that I did.

So the gear I used was:

- Camera (Captain obvious)
- Tripod
- Macro lens (105mm VR Macro f/2.8)
- SB-600 (Since I lack a Macro flash/ring)
- Light stand (To hold said flash)
- Wireless Shutter Release

- Stool
- Flower (Gerbera Daisy)
- Vase

So what did all that look like?  Well I decided to take a photo of the setup with my phone to show yeah.  However as I mentioned there, it was with my phone so sorry for the quality:

My Macro Shoot Setup
So I had my SB-600 left of camera pointed at the daisy which was mounted on my light stand.  The D90 with the 105mm VR Macro lens on my tripod.  I had a lamp lighting the flower however I had my flash set to overpower the lamp so it didn't effect my photo.  The lamp was just so I could see the flower so I could focus on it.

To the right side of the photo you can see the light getting by my black curtain which is what I used as a black background to get this effect:

Gerbera Daisy - 105mm VR Macro
Where as I used my wall for the white background however it wasn't white enough for what I wanted so I used a sheet of printer paper.  So I held a sheet of printer paper behind the flower to get a white background as seen here:

Gerbera Daisy - 105mm VR Macro

As for other details, you mostly get the shots you want after experimenting.  I didn't really have an idea of certain photos I wanted, I just tried different angles, lighting and backgrounds.  As for camera settings, you have a lot more control over them inside than you do out in a garden.  I was continually changing my aperture and shutter speed to see what effect it had on that on the photos.  Usually I am restricted by aperture when I do shots outside since I want a very fast shutter speed to freeze any motion from wind or my hand shaking since I mostly shoot handheld.  Another tip I can give is keep checking your histogram to make sure nothing is too far off the left or right side.  As well it helps to have the most information in the centre of the histogram and as close to the top of the of the chart as possible without going off the top.  The larger the area in the histogram the more information in the photos usually.  

Also I just thought of one thing I did that was extra was I washed off some pollen of the petals.  I was doing some 1:1 shots so I wanted to make sure I didn't have extra pollen on the flower. 

I hope that helps and again any and all questions are welcome.  Just send me an e-mail at tomhouston7@gmail.com and I will gladly answer your questions.

Friday, 9 September 2011

Photos: Macro

Hey,

So I was doing more writing in my blog than I was doing photography lately so I decided to change it up a bit.  I went out and bought a Gerbera Daisy and decided to do a macro shoot.  Usually I am crawling around in my mom's garden when I am home taking photos of flowers.  However this time I wanted to control all the variables.  So here is a sneak peak and then I will put of the flowers and how I got the shots:

Gerbera Daisy - 105mm VR Macro

Gerbera Daisy - 105mm VR Macro

Stay posted for more photos as well as how I setup the lighting and such.  Hope you enjoy!

Monday, 29 August 2011

Focus: Which Lenses To Start With?

Focus: Which Lens To Start With?

Well to start off on a wrong foot, I actually can't tell you the perfect lens for you.  But I can tell you what good lenses are and why and go from there.

So I will discuss this post as if you are starting with your DSLR and you're looking for another lens to go with your kit lens.  And since I use Nikon, this will be Nikon oriented since that is what I know.  So most start with a 18-55mm or 18-105mm.  These are decent lenses however are limited in quality of glass and maximum aperture size.  So usually this is noticeable in dark settings with the limited aperture ability of the kit lens.

So, what could you get next?  Well that mostly depends on what you want to shoot so I can't help you there but I can help with some good ideas that are lenses you wont want to sell later.  The two lenses I would recommend is a 50mm or 35mm.  Both these lenses are lenses I know people don't replace unless it is for a f/1.4 version.  Also these lenses can be cheap, and they are small.  They are prime lenses so they do not zoom, so that means you have to walk around a little more to compose.  This trains you a little more with composition which isn't terrible since that helps you especially at this stage.

So the 50mm's.  There is the 50mm f/1.8 D, and the 50mm f/1.8 G.  I used the 50mm f/1.8 D and it was great.  It is an amazing lens and it is cheap.  Less than $200, and for the quality of the lens that is quite the bargain especially when you are starting out.  So the 50mm is a great portrait lens so if you take photos of people a lot this is a great lens.  Since it is a prime lens they are very sharp and have very wide apertures.  The 50mm f/1.8 G I am sure is also a good lens.  I have never used it but the 50mm is classic, Nikon wouldn't mess that one up.

Now if you want to capture a little more in your photos the 35mm is less zoomed in.  It would capture a person and their environment better, or a small group of people.  Now of course you can walk closer or further away with either the 35mm or 50mm but with the 50mm I found myself backing up into walls and tables to get more than one person in the photo.  So the 35mm is a good "do it all" type lens because it is wide but not too wide to take portraits still.  The 35mm f/1.8 G is a good lens and very sharp.  My full review of the lens you can find here.  It isn't a very expensive lens but it is more than the 50mm f/1.8 D. 

So if you are not interested in a prime, well that's too bad but there are other lenses.  An 18-200mm is a good lens as a kit lens as well but that is a lens that you usually do not keep.  It again is a variable aperture zoom which doesn't fix the aperture constrictions you have with your last kit lens.  I have a friend who is a photographer and they bought a 18-200mm as a kit lens and now wants a new lens.  It is a good lens but is a "jack of all trades but a master at none."  So usually you replace it with other lenses that are masters.

Another option now for DX or cropped sensor cameras is the 40mm Micro (macro) lens.  It would be like the 35mm but you could experiment with macro photography as well.  This lets you take photos of flowers and bugs etc.  I have never used it and it is relatively new but it is a lens to think about for sure.  I love macro myself so I got the 105mm VR Macro but that is a fairly pricey lens.  Or was when I bought it.

There are some lenses a lot of people are tempted to get for a second lens like the 55-200mm.  Again, it is a beginner lens which works I am sure but you will want to sell it in a year so you may just want to save your money and get a better lens now.  The advice that is always tossed around is to invest in glass (lenses) instead of cameras.  Lenses usually hold their value more and are replaced less often.  So don't be afraid to invest in lenses.  It is usually worth it.  The lenses that do decrease in value are the starting kit lenses because people usually buy them and then try to sell them within the year so there are a lot of them floating around.

So usually try to get a fixed aperture lens.  They help you with low light and they usually are better than a variable aperture lens.  The less expensive ones are usually primes like the 35mm f/1.8 G and 50mm f/1.8 D or G.  I hope that helps.  I just wanted to get some of that information out there to help photographers starting out and trying to get a second lens.

Sunday, 21 August 2011

Focus: Shutter Speed. My Take On The "Exposure Triangle" Part II

Focus: Shutter Speed. My Take On The "Exposure Triangle" Part II


Part I covered aperture which I decided to cover first.  If you did not read it, you can click here to read the post.  I would recommend covering aperture first since this post will build on that knowledge a little.


Shutter speed is the duration it takes to open and close the mechanism that allows the light to hit the film or sensor of the camera.  It is the click as you take your photo.  Shutter speed allows you to control again how much light you can let it just like aperture does just in a different way.  


Slow shutter speeds keep the shutter open a longer amount of time which allows more light to pass through to the sensor/film to create a brighter image.  Having a fast shutter speed opens and closes the shutter quickly creating less time for the light to come through the lens to hit the sensor/film.  So both aperture and shutter speed control how much light hits the sensor however they both do this in different ways.  Just like aperture, shutter speed has other effects on your photos than just controlling the amount of light that is let in.  Aperture had an effect on the out of focus areas of the photo or bokeh as well as the Depth of Field (DoF) of the photo.  Shutter speed has it's own effects.  


However before I go into the effects of shutter speed I will discuss how it effects your photos if you are not using it for creativity purposes.  Shutter speed is something that can negatively effect your photos beyond having them too bright or too dark.  Using a slow shutter speed allows the camera to capture the movement of the camera which in most cases is from your hands shaking a little.  This results in blurry photos and lights streaking around in the photo.  Using a fast shutter speed ensures that the photo is captured quick enough that there isn't enough time to have any camera shake effect the photo.  Usually in most cases between opening up your aperture and slowing your shutter speed you can get decent photos if you do not have a lot of light.  There can be a couple of reasons you need to have a slow shutter speed.  If you cannot open your aperture wider due to the lens or you want a certain aperture for a desired DoF then you have to play with the shutter speed to get the right exposure. If your aperture limitations cause your shutter speed to be too slow for a hand held shot then you will get blurred photos.  This can sometimes be fixed with a tripod if the subject of the photo is stationary, or now with some newer lenses there is the ability to decrease the effect of camera shake.  


Using a tripod as a fix for slower shutter speeds is helpful if you are doing landscapes since usually there is not a lot of movement and therefore having a 2 second shutter speed wont result in a photo that looks like abstract art.  You are in a tough spot if you need to have a slower shutter speed and have your subject moving around.  For me this is what I run into at concerts.  Lighting is terrible and the singers are moving around.  Here is where it is very useful to have a large aperture on your lens.  


From the example from the concert, you may have noticed that a faster shutter speed "freezes" movement in a photo better than a slower one.  So with a fast shutter speed, you can capture something moving in a still photo and not have it blurry.  However if you are photographing something moving with a slow shutter speed you get motion blur.  The problem here is that sometimes you want motion blur and sometimes you don't.  Having your camera setup on a tripod you can get motion blur of cool things like stars or water which both can have very cool effects.  However if you are again taking photos of a concert and use a slow shutter speed as someone is strumming a guitar, you just get a semi sharp portrait with a very blurry hand/arm which looks kinda weird most of the time.  


Before I go into the cool effects that shutter speed can have I am going to lastly go over how your lens can help.  So we went over aperture already, but some newer lenses have the ability to shake opposite to your hand to allow for slower shutter speeds without camera shake effecting the photo.  Different camera/lens companies call this technology different things.  Nikon calls it VR for Vibration Reduction, Canon calls it IS for Image Stabilization and Sigma calls it OS for Optical Stabilization.  Personally I am a Nikon user so I only know how well Nikon's VR works but I am sure they all are basically the same.


VR is very useful and I only have it in one of my lenses.  I have it in my 105mm Macro lens.  Most people think that it shouldn't be in a macro lens but it is outrageously useful.  I rarely use it with a tripod as I should for marco work.  However I have managed to capture some very good marco photos (I think but you can make that call so I tossed one of my hand held macros at the end of the post) without a tripod and just taking photos hand held.  Shutter speed along with VR help do this as well as sunny days and steady hands.  I have heard photographers speak and write about the new 70-200mm VR II Nikkor lens and it's amazing ability to get shots with slow shutter speeds.  It is a useful technology that definitely helps photographers get tougher shots in low light that were almost impossible before.  


Now for how you can use shutter speed to help you.  You can use a fast shutter speed to capture actions or movement.  I think my best example of this would be in this photograph:


Humming Bird - BC - 18-105mm VR


So with a fast shutter speed I was able to capture a photo of a hummingbird with it's wings not blurry.  That is impressive since their wings beat at 60-90 beats per second or so.  Slow shutter speeds can get nice night shots with stars as well as motion blur like this photo:


Queen Charlotte Islands - 18-105mm VR
I took this photo with a semi-slow shutter speed in a car while it was moving.  This slow shutter speed allowed me to capture the movement of the car.  To be honest I accidentally took this photo, but I liked it a lot so I kept it.  


To sum this up, shutter speed is the duration of time that the shutter allows light to pass through to the sensor/film which dictates the amount of light that is let in for the photo.  So now aperture along with shutter speed control the amount of light that is let to the sensor/film.  Together they can be used in combination to allow you to get the look you want in you photo be it a large or small DoF to motion blur or freezing action.  


Next I will go over the last thing responsible for the brightness or darkness (exposure) of your photos, ISO.  So that will be Part III.  Since ISO won't take as long as shutter speed and aperture, I will tie them all together in Part III.  


Again, if you have any questions to make anything clearer please do not hesitate.  Hope this helps.  And always remember to practice!


As I said with the macro shots and the aid of VR, here is a hand held macro shot:


Frog - 105mm Macro VR

P.S. I've now made videos on my youtube channel about the exposure triangle so here is the one on shutter speed:  http://youtu.be/z1VNrU6PofI


Friday, 1 July 2011

Photo Shoot: [E]

I finished editing the photos of the shoot today and I think they look great.  It was shot on a farm mostly by an abandoned house that was falling apart.  Sadly it was a little too unsafe to go into due to all the lead based paint falling off the wood everywhere.  Also the floor boards would probably give way under weight.

Anywho, great shots as I said and I do really like them.  I will put up some photos here that are not on my Flickr account just to have some variety.  My Facebook Page for photography will also have some unique photos from the shoot as well so be sure to check those out.

Portrait - 50mm f/1.4 D
Portrait - 105mm 

Portrait - 50mm f/1.4 D

Portrait - 50mm f/1.4 D
 So again make sure to check out the other photos on Flickr at: http://www.flickr.com/photos/tomjbh/sets/72157627094657878/


And as well on my photography page on Facebook:


I hope you enjoy the new photos,

Tom

Monday, 23 May 2011

Review: Manfrotto 190PROB Tripod with 488RC2 Ball Head

Review: Manfrotto 190PROB with 488RC2
Thoughts and Opinions:
This is a very sturdy and well built tripod and ball head.  I really do enjoy the time I have used it.  To be honest I have not used it too too much however when I do need it, it is nice to have.  
The weight is on the heavy side for taking it on a hike and what not however I want heavy because of stability.  So the tripod wont blown as much in the wind as well the chances of knocking it over is less as well.  
It is nice to have the ability to have a horizontal center column for taking macro shots with this tripod.  The extendable legs work well and are sturdy.  The material is used for the construction is good.  
Overall a very good quality tripod.
Usage:
Long exposure photography was my main use, I sometimes use it for Macro work but my 105mm VR is usually fine without a tripod and I usually find it does more harm than. good having my tripod there for macro work.  But I did cover that with my 105mm review.  I have used my tripod for macro work it is stationary like flowers in my mom's garden.  Sometimes I use it for portraits. 
Pros:
- Well built
- Good material
- Sturdy
- Good weight
- Great cost for performance
Cons:
- None come to mind
Sample Images:
Fireworks, July 1st, Sault Ste Marie - Tripod
Tokina 11-16mm

Milky Way, Ermineskin, AB - Tripod
Tokina 11-16mm

Long Exposure, Ontario - Tripod
18-105mm
Conclusions: 
This is a good tripod and does it the trick.  I am very happy with it and I am glad that I got it.  As I said it is sturdy and well built from good materials.  If you are looking to get a tripod, Manfrotto does, from my experience, have good products.  My buddy also has a Manfrotto tripod and likes it as well.  
Sorry this was a semi-short review but it is fairly straightforwards that it is a good tripod and such.  If you have anything you think was left unanswered from this review feel free to comment on this post and let me know.  I would not mind at all in answering your questions.

Friday, 13 May 2011

AF-S VR Micro-Nikkor 105mm f/2.8G IF-ED

Lens Review: Nikkor 105mm Macro VR
Thoughts and Opinions:
Where to begin... well lens may be my favourite lens.  I just thought about it for a second there and concluded that it is my favourite lens.  I thoroughly love this lens.  Here is why:
This lens is tack sharp, hands down.  The detail it can pick up just makes you want to take pictures of everything to see what things look like at a macro level.  It is a great macro lens.  It is great at taking 1:1 photos and they look great.  I can go on about why this is a good macro lens but I would rather keep this review shorter than a novel if I can.  
If I have space to back up, I use this lens for portraits as well because it is tact sharp.  Turns out it is a wonderful portrait lens.  Personally, I want a 85mm however between a 50mm and this 105mm, a 85mm might not have it's own niche there.  I have decided that if I keep doing portraits a lot and such, I may get a 85mm but as it stands my 105mm does the trick just fine.  
One bad habit that this lens allows me to get away with is not having to lug around my tripod with me everywhere I go.  Now this is just from my personal experience and I do not suggest doing this but, the VR on this lens lets me get away without using my tripod.  Any website you find on taking macro shots will have "use a tripod" in there however I find it just limits what I can do.  Yes, I am sure I could have better shots if I use a tripod.  I agree there, but I was in Saskatchewan and I was chasing shy dragonflies around these bushes which was difficult to begin with.  It was hard to slowly sneak up on the dragonflies and would have been nearly impossible with a tripod.  Another time I was balancing myself on a branch on a muddy river bank to take photos of frogs.  Again, it was very difficult and if I had my tripod I could have ended up swimming with it in the river.  So that is just my personal view and I know it isn't the best way but it works for me.  I can't promise it would work for you but I can tell you this is an amazing lens.
The cost has dropped since I bought it but that only means it is even better for its cost performance.  Also a lens this good, which has the Nikon's pro gold ring around it, is a no brainer if you like macro or want a good sharp versatile lens.  It is pro glass and it less than $1000.  
One thing about this lens that always makes me happy is the colour rendition.  As I mentioned in my Tokina 11-16mm review, I want photos that look like what I saw with my eyes.  The closer the photo is to what I saw then the happier I am.  My examples of this is taking photos of leaves in the fall because I find with other lenses the colours get a little darker and muddier looking.  I took a photo of yellow leaves in the fall and it was exactly how I saw it.  Also I took photos of a pow wow in Saskatchewan and the colours of the all the outfits was truly amazing.  And again, the 105mm passed with flying colours with colour rendition.
Before I got this lens, I tried out my Godfather's macro lens.  He owns the Tamron 90mm.  This was a good lens and I got some nice shots with it however I had a few issues with it during the short time I had it.  The autofocus was slow and loud.  I know AF is not used for 1:1 because it is easier using manual focus but I wanted a lens for more than just macro.  A slow and loud AF wouldn't be fun for portraits other other non-macro uses.  I could be wrong but I don't believe it had any vibration reduction either.  This was also a negative because I didn't want to have to be attached to a tripod for everything I did with a macro lens.  Another feature that caused the Tamron to lose points was the lens did not have internal focusing.  The barrel extended almost half of the original length of the lens.  It was almost far enough when you are doing 1:1 you could bump into things.  Also having this large object moving towards a shy insect could be troublesome.  Because of these things, I ruled out the Tamron.
I put a lot of thought into getting the Sigma 150mm Macro.  It was a worthy contender however it did not have stabilization as well, and I know sigmas are known to be heavy.  For these two reasons I did not want to chance it if I wanted it to work well being hand held and hiking with it. 
My only bone to pick with this lens is that it actually is not a fixed aperture lens.  Depending on focusing distance, it can go up to f/4.  It is a minor detail since that is only when you are very close to something which helps most of the time because it gives you larger depth of field (DOF) which aids with macro photography.  At f/2.8 in a 1:1 photo, the DOF would be smaller than a dragonfly's head.  
Just as a side note, the lens hood for this lens is very good.  It stops the sun from coming in from bad angles for outside shots as well as protects the front element from easily being hit by anything.  
Usage:
As I have mentioned, I use this lens for macro work, portraits and anything where I want the colours to be perfect.  
Pros:
- Sharpness
- VR
- Relatively fast and quiet focusing
- Internal focus
- Good for macro, portraits and vibrant coloured photos
- Cost for performance 
- Pro glass
- Not too heavy
- Built like a tank
- Focus range switch
- Nice lens hood
- FX lens
Cons:
- Aperture changes with distance, but that helps increase depth of field which is nice for macro shots
Sample Images:

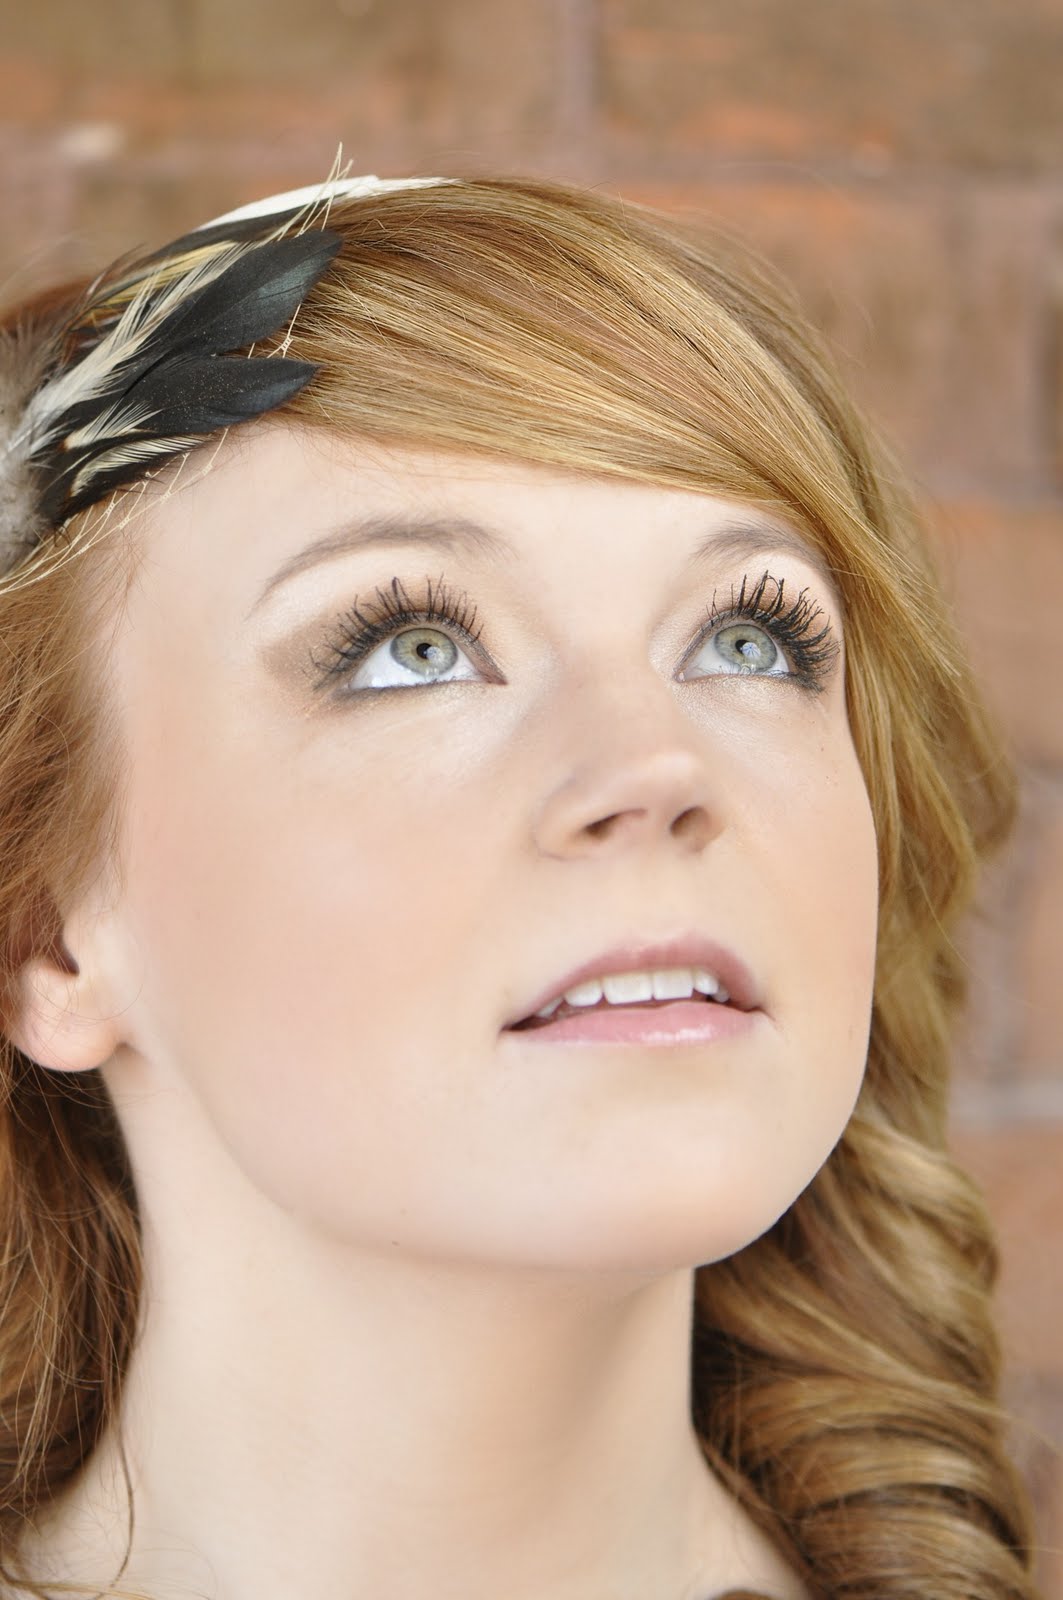
Portrait of Hayleigh - 105mm (Portraiture) 

Frog - 105mm (Macro work)

Fall Leaves - 105mm (Colour rendition)

Conclusions: 
As I am sure I you’ve noticed, I think very highly of this lens.  The Nikkor 105mm Macro VR is a very good lens.  I highly recommend it for macro use as well as portrait or nature shots.  It doesn’t have a lot of reach with this lens for only being 105mm however for my purposes I find 105mm is perfect.  Also on the D90 it is more around 150mm because of the crop factor.  Anyways, this is a very solid and sharp lens.  For the price and the versatility of the lens it would be a little silly not to own.  Haha, but that is just my opinion.  So in conclusion this is my favourite lens, and I am very happy with it so far.  If you are thinking about purchasing this lens, I would, but if my word is not good enough I would keep reading reviews of it and you’ll find nine times out of ten this is the lens people pick for macro work.  I did a good month of research into macro lenses and that is what I found.  Hope this helps if you are sitting on the fence.

I would definitely give this a near perfect score if I had a rating system.  


If you have any questions please don't hesitate to e-mail me at tomhoustphotography@gmail.com.  Also if you are interested in visiting my photography website to see my top work, please visit it here: www.tomhoustonphotography.ca.


Rating: Overall 4.5/5


Macro Photography: 4.9/5
Portrait: 4.5/5
Overall: 4.5/5


Lastly, I have started doing video instead of writing my long blog posts.  I started up a Youtube channel and I will be re-reviewing all my gear there in a video so here is my one for the 105mm http://www.youtube.com/watch?v=JfbknCpkio0

Hope that helps!